 MarkHub
Dashboard
Choose the right dates
Use reporting presets and the calendar with confidence. Check the date range before comparing any two numbers.
- 01
Choose your dashboard periods
On Dashboard, open Period to choose the combination of reporting periods shown in the summary tiles. This changes the tile presets; it is separate from the product table’s custom calendar.
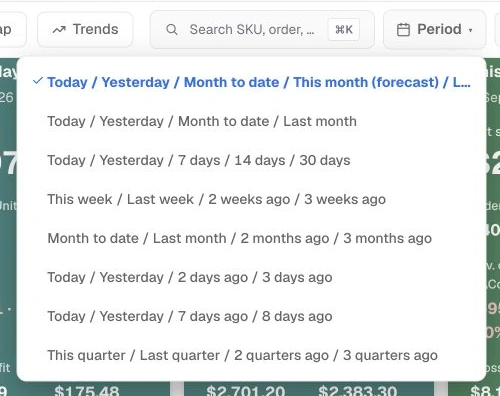
The Period menu controls the reporting periods displayed in the dashboard tiles. - 02
Select a custom date range
Above the products section, select Change period. Use a preset on the left for a ready-made range, or select your start and end dates in the calendar. Check both dates, then select Apply to confirm.
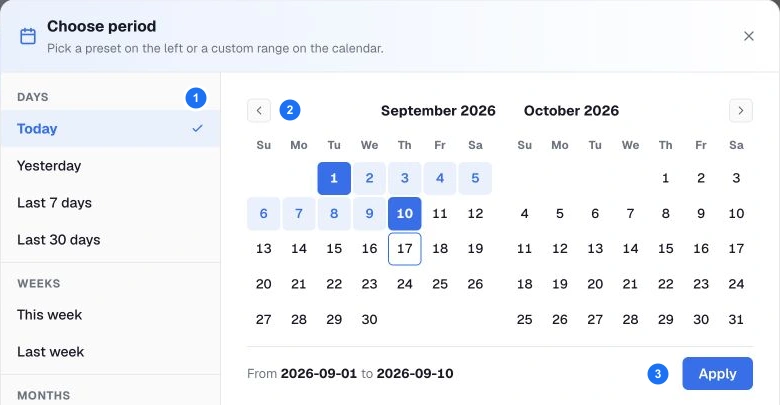
1: choose a preset. 2: select custom dates. 3: Apply the range. This example selects September 1–10. - 03
Read results for the same period
Check the dates displayed on the report before comparing revenue, costs and profit. Analytics and Orders have their own period controls, so confirm their selections too.
Screenshots show demonstration data. A reporting period is not a guarantee that the latest Amazon activity has already synchronized.
Try it in MarkHub.
Explore these screens with sample products and orders. Demo changes stay separate from real stores.
Open the interactive demo